
Getting started
Kipuu for Mac
The Kipuu app for Mac, with the same tools as the phone app, plus a Kipuu folder in Finder that works like iCloud Drive: drop files in and they upload.
Kipuu for Mac gives you two ways to work. The Kipuu window has everything from the phone app: your folders, Recent, Favorites, Photos, Trash and your account. And the Kipuu folder in Finder sits on the left side, next to iCloud Drive, so you can save and open company files from any app. It works on macOS 14 Sonoma or later.
Step 0: download Kipuu for Mac
On your Mac, open kipuu.com, click Download at the top (red 1) and choose Kipuu for Mac (red 2). The Kipuu.dmg file downloads to your Downloads folder. It's signed by Windoce and checked by Apple, so your Mac opens it without warnings.

Install it
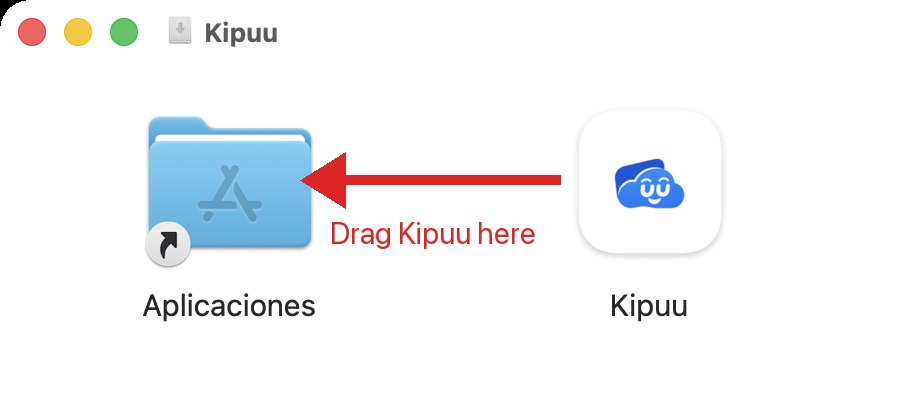
- Open Kipuu.dmg from your Downloads folder. In the window that opens, drag the Kipuu icon onto the Applications folder.
- Open Kipuu from your Applications folder (or search for Kipuu with Spotlight). The first time, macOS may ask whether you want to open an app downloaded from the internet: click Open.
- Sign in with your Kipuu email and password. If your account uses two-step verification, enter your code. If the window closes while you type, your email is still there when you come back.
- The first time, turn on the Kipuu folder in Finder with the three clicks below.
Turn on the Kipuu folder in Finder (one time)
macOS keeps every new cloud folder off until you allow it, the same as with Dropbox or OneDrive. It takes three clicks and you only do it once.
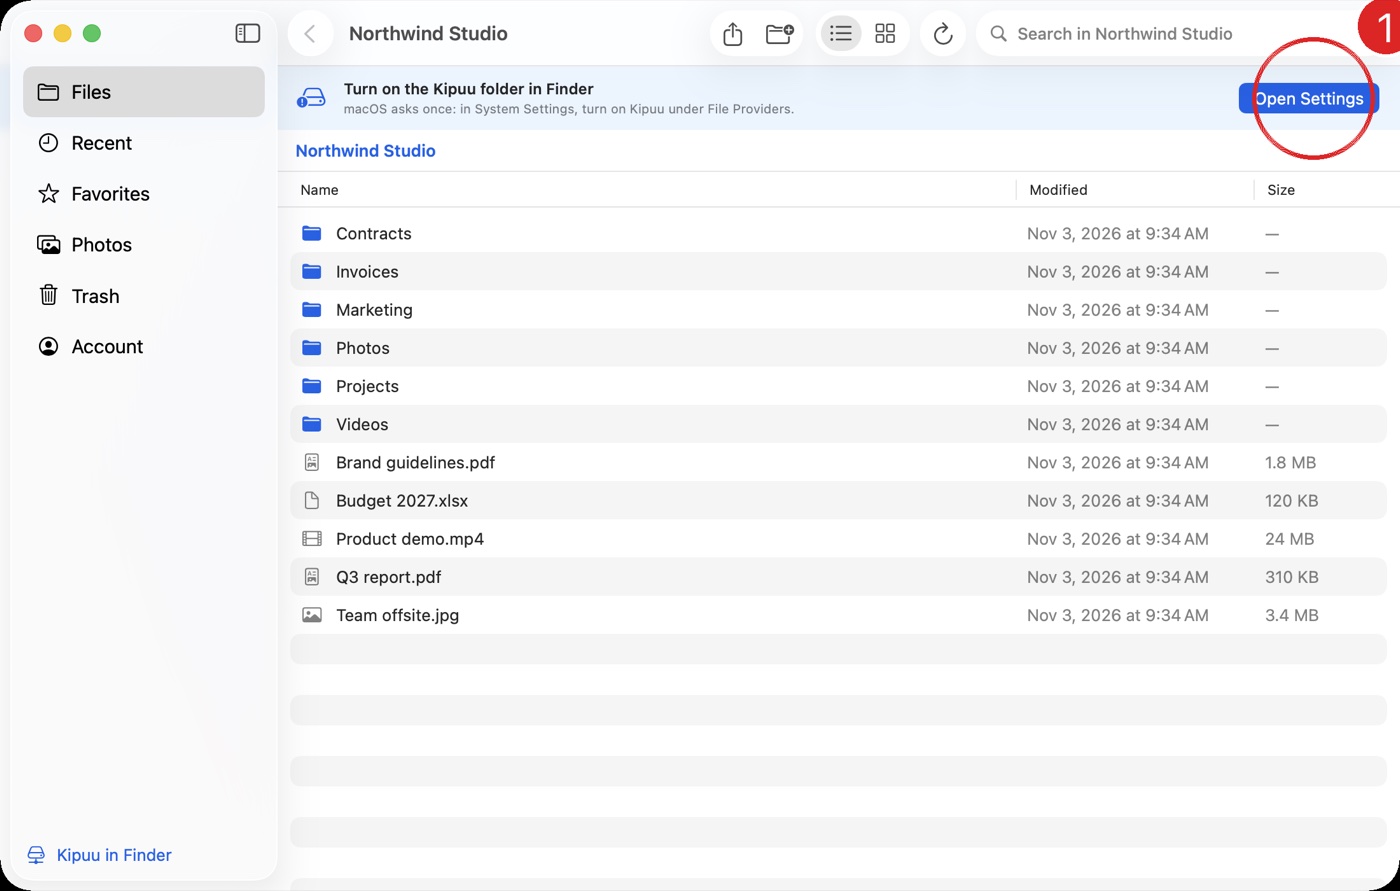
- Open Kipuu and sign in. Click Open Settings in the blue bar at the top (red circle 1).
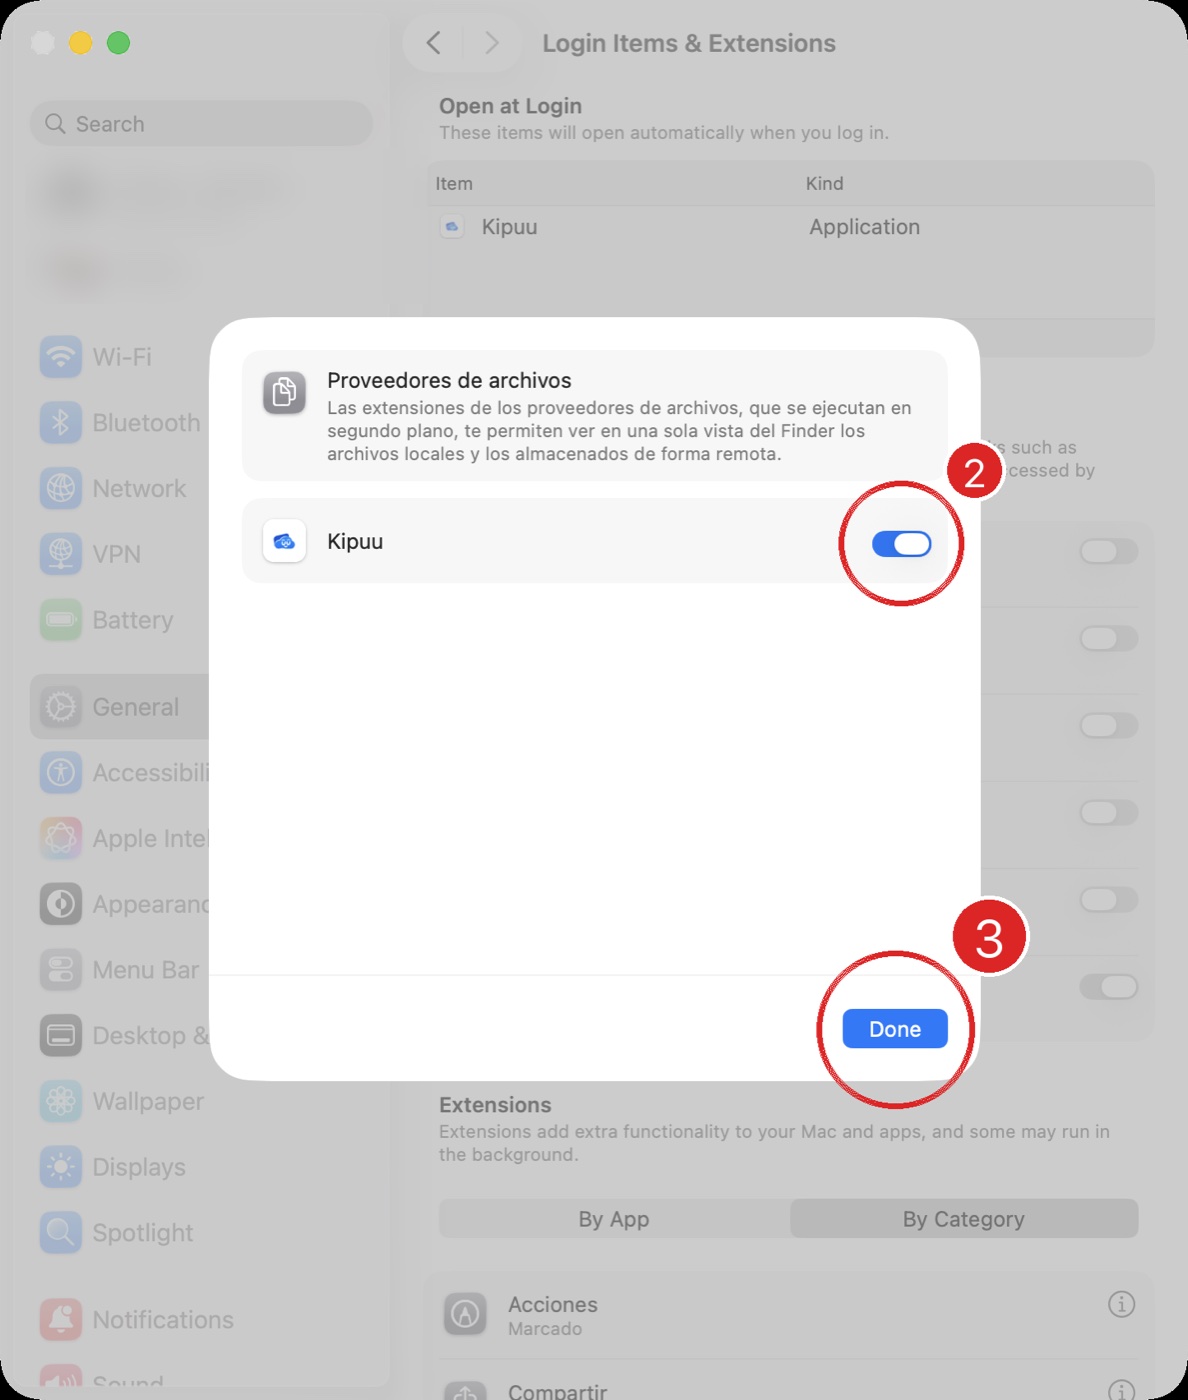
- System Settings opens right on File Providers. Turn on the switch next to Kipuu (red circle 2).
- Click Done (red circle 3). The blue bar in Kipuu goes away by itself.
- Open any Finder window: Kipuu is on the left, under Locations (red circle 4).
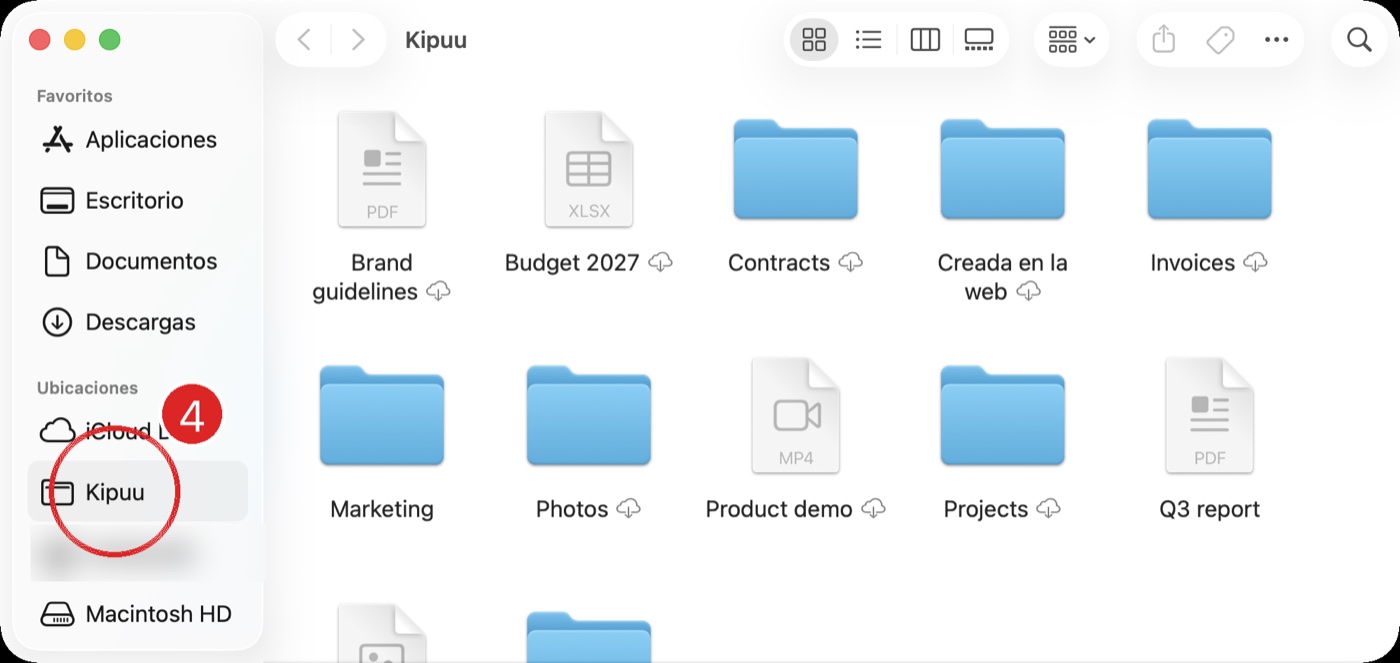
If you closed the bar, you'll find the same button in Kipuu under Account, then Kipuu in Finder. You can also get there yourself: System Settings, General, Login Items & Extensions, then the information button next to File Providers.
If Kipuu shows a crossed-out circle
A crossed-out circle on the Kipuu icon means that copy can't open on this Mac, for example the iPhone version or an old test copy. Drag that Kipuu to the Trash and install Kipuu for Mac from kipuu.com, with Download, then Kipuu for Mac. The right one has the blue cloud with no circle.
Common questions on the Mac
- Where do I give the permission? In System Settings, General, Login Items & Extensions. Next to File Providers, click the information button and turn on Kipuu. Kipuu takes you there with Open Settings.
- I don't see Kipuu in Finder. Check that the Kipuu switch is on (above). Then quit Kipuu from the cloud in the menu bar and open it again. If it still doesn't show, restart the Mac: Finder refreshes its sidebar and Kipuu appears under Locations, below iCloud Drive.
- A file takes a while to open from the Kipuu folder. That's normal the first time, the same as iCloud Drive: files show a cloud and download when you open them, so a long video takes longer. After that it opens instantly. To have something ready ahead of time, right-click it and choose Download Now. To make room again, choose Remove Download.
- To watch a video right away, open it from the Kipuu window: videos and audio start playing while they arrive, without downloading the whole file. Photos and documents open with a double-click in the Mac's preview.
The Kipuu window
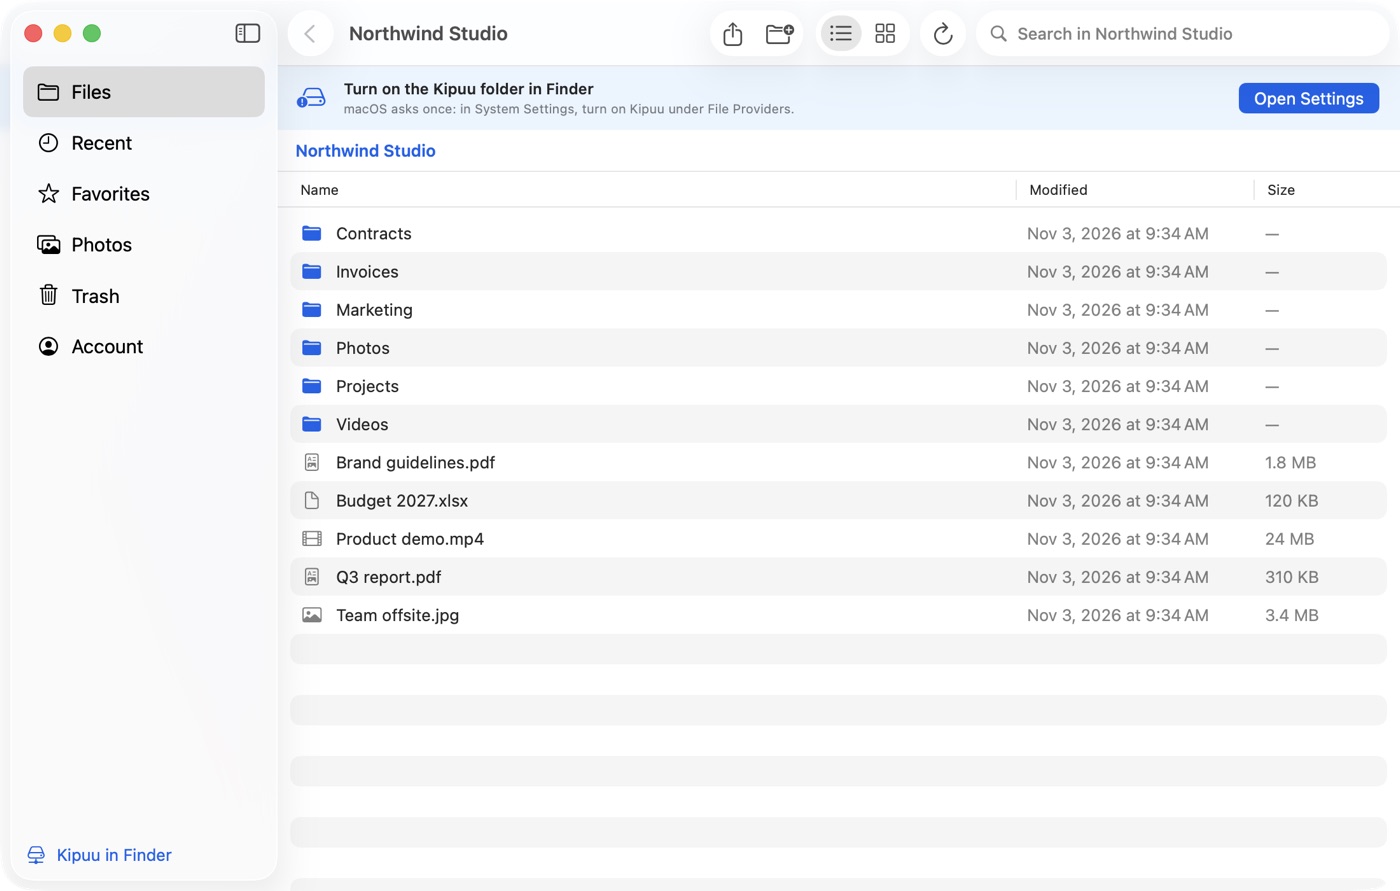
- Upload: drag files or whole folders from Finder onto the window, or select Upload. Large files, like long videos, upload in pieces, several at a time, and keep going if the internet drops for a moment.
- Open a file with a double-click. Right-click any file or folder to download it, copy a share link for someone outside your company, add it to Favorites, rename it or move it to another folder.
- To move something, you can also drag it onto a folder or onto a folder name in the path at the top.
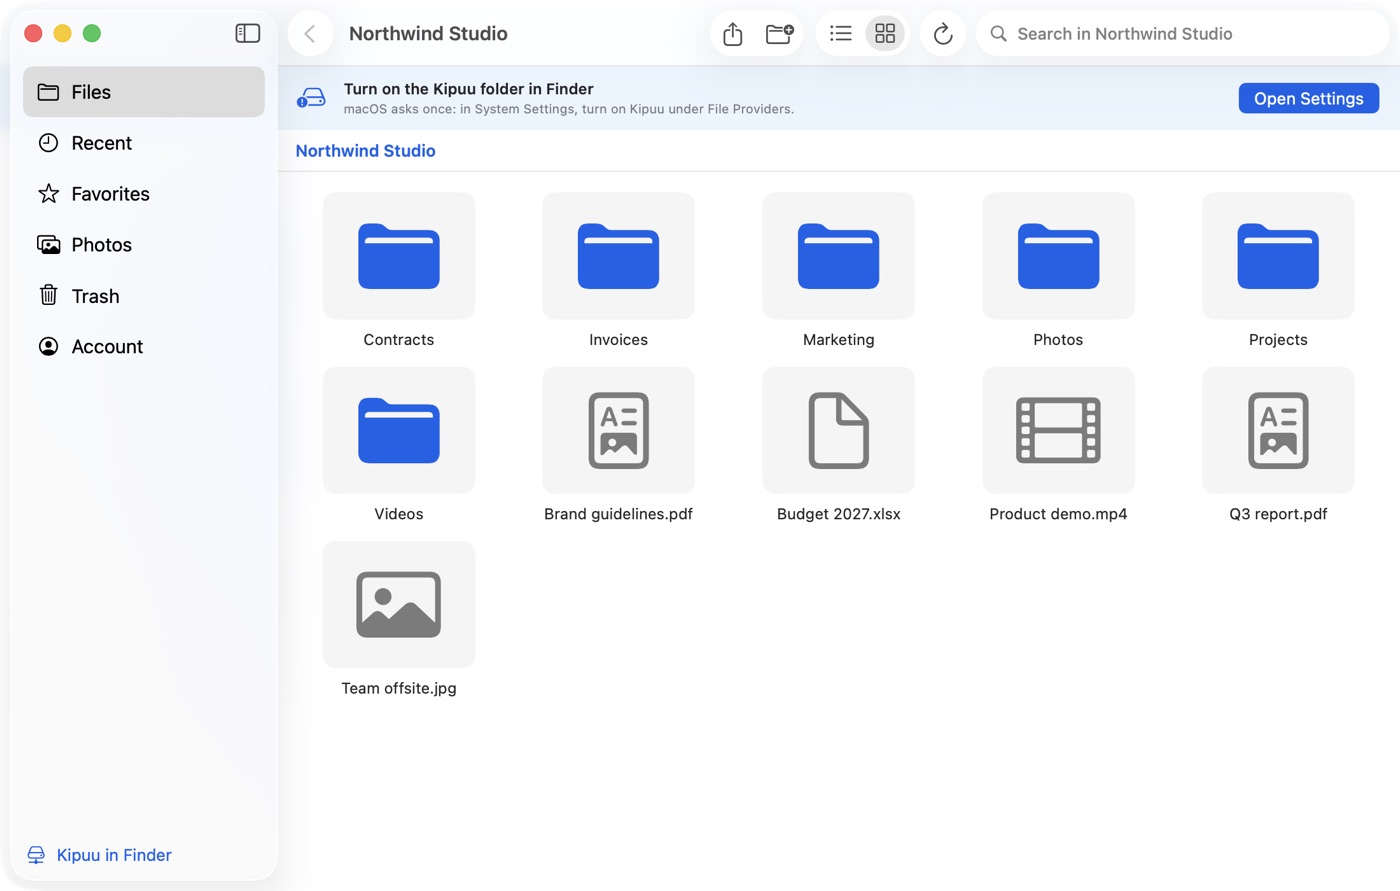
- Switch between list and grid at the top right. The grid shows thumbnails of photos and videos.
- Move to Trash is the last option of the right-click menu, and it asks first. Anything in Trash comes back with Restore.
The Kipuu folder in Finder
- Find Kipuu on the left side of any Finder window, under Locations. If you're in more than one company, each one has its own folder.
- Drop or save a file there and it uploads to Kipuu. Your team sees it on the web, on their phones and on Windows.
- Files show a cloud until you open them, so they don't fill up your Mac. Each one downloads the moment you open it.
- Rename, move or delete in Finder and it happens in Kipuu too. What you delete goes to the Kipuu trash, where you can restore it.
- What others change on the web, the phone or Windows shows up in your folder within a minute.
The icon in the menu bar
The cloud at the top of your screen tells you whether Kipuu is up to date or uploading. From there you can open Kipuu, open your Kipuu folder in Finder, turn opening at login on or off, sign out or quit.
Can Kipuu back up my Mac's folders on its own?
Yes. Open Folder backup in the sidebar of the Kipuu app. Choose Documents, Pictures, Desktop, any folder or a whole drive, and everything new uploads by itself. The guide Back up your computer's folders explains it step by step.